
Hugo, Github, Travis: a step in continuous deployment!
March 30, 2018
static website continuous deployment blog R inSileco
Kevin Cazelles, Steve Vissault


Table of Contents
I (Kevin) recently rebuilt my personal website and I was eager to set up the same workflow Steve built for our blog (this blog!), i.e. a combination of Hugo, Github and Travis. I though this was a good opportunity to detail how it works and so I wrote this post with Steve. Note that there are several blog posts on the topic available online, for instance here and here. We did our best to complement them in the following post.
The big picture 📷: continuous deployment for static website
Continuous deployment (CD) is a set of automated procedures to build an environment from scratch and test a software within it as soon as code has been committed. Basically, following a push/modification on the code, the CD service connected to your repository (via a web API) triggers the build of the modified code. Optionally, the CD service notifies the developers whether or not the build has passed. CD services have originally been designed for softwares engineers.
The beauty of the micro services world today is that you can easily adapt services such as CD service to solve a problem. The problem with static website generators is that every time you modify the information on your website, you need to push those edits to your hosting server. I (Steve) hate repetitive tasks, so I decided to use a CD service to automatically build and send the new modified website to the hosting server.
We detail below how we use CD for this blog and http://kevincazelles.fr/. As mentioned above, we used Hugo, Github and Travis. Let’s have a few words about those three.
Hugo: static web generator
According to the official website, Hugo is “one of the most popular open-source static site generator” written in GO. Basically, once Hugo is installed, you first pick up a theme, add your data using either YAML, TOML or JSON, write content in Markdown and then Hugo takes care of generating you website for you! Obviously there is way more to say about Hugo 😼! if you are interested to learn even more about Hugo, visit the exhaustive official documentation and watch the great Giraffe Academy tutorials.
For Kevin’s personal website pure Hugo was used and for our blog we are using blogdown that allows us to write our blogposts in R Markdown. In other words we can directly integrate R outputs (results/figures) in our posts, which is a key feature for us as we are big time R users.
On a side note, if you are interested in static site generators at large, have a look at this awesome list. Most of them are good substitute for Hugo in the workflow we are describing, e.g. Steve used Harp combined with pugjs for his personal website.
Github to track the code and host the website
As you could read on Wikipedia:
GitHub is a web-based hosting service for version control using git.
Github
(and similar services like Gitlab
and Bitbucket ) are wonderful/essential
tools to host, version control, and share your code. For instance, our blog is available
at https://github.com/inSileco/inSileco.github.io, but if you want to get the whole
code underlying it, you can clone it
or fork it. Also, if you find
any issue/bug, you can easily report an issue.
On top of these services, Github proposes to host website through the Github
pages a.k.a. gh-pages service. Basically, if your
repository or part of it (a subfolder docs or a dedicated branch) is a website,
Github will assign an URL to it and so your website will be put on line.
We used this service to host our blog at https://insileco.github.io/.
Travis CI: check and deploy the website
Travis CI is a Continuous Integration (CI) service, i.e. an online service that “[automates] the build and testing of code every time a team member commits changes to version” (Sam Guckenheimer on Visual studio. Note that there are subtle semantic differences between CI and CD, as explained by Sten Pittet on Atlassian. In practice, as soon as we push a new commit on the Github repository of our website, Travis rebuilds an environment on one of his Linux server, i.e. all softwares required are installed (e.g. Hugo), builds the website and reports whether or not the build has passed or not (note that the user can write unit testings for additional checks). Using Travis for our blog ensures that our website can be rebuilt in a specific Linux environment, the very same environment for all authors of the blog. Therefore, even though we develop our website and write posts in different environments (and even different Operating Systems), we can verify that local configurations are not affecting the visual rendering of our website. Furthermore, Travis allows us to deploy our website on a gh-page. After any change is committed to the code underlying our website, the code is checked and the new version of the website is transfered online if the built is successful (The build passed!). Travis is the key to our CD. By the way, Travis CI is really convenient when working with Github (and R as R is a community supported language on Travis). There are however a lot of different CI services. Have a look at this awesome list for more!
Make Travis and Github work together
Once you have an account on Github you can easily sign up to Travis. By doing
so, you will actually allow Travis CI to access certain information of your Github
account through the OAuth protocol (to
see the application you have granted such access, go to settings -> Applications -> Authorized OAuth Apps
on your Github account). Travis will then have access to all your public Github
repositories (note that you can also gain access to private repository if you want to, but only public repository are
free for an unlimited number of builds). The access granted through the OAuth
protocol is actually enough to trigger a build of your website on Travis after
a push on the associated Github repository. It is however not enough to
let Travis deploy your website: an authentication token is required. Below we
detail the steps required using the set up process for Kevin’s personal website.
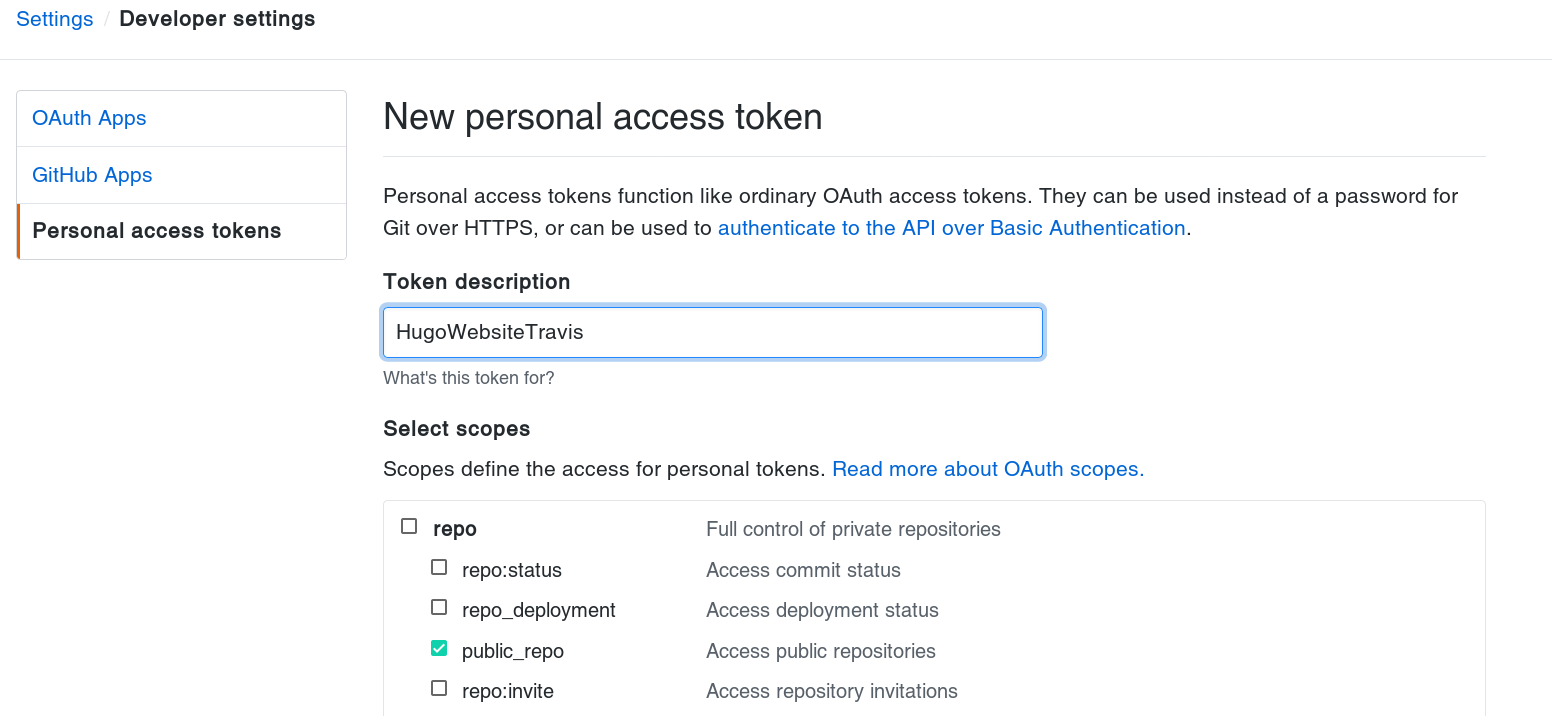
1- Generate a token on Github
-
Go to
Settings -> Developer setting -> Personal access tokenson your Github account, click onGenerate new token, have a look at the documentation for further details. -
Enter your password and then select the kind of token you need and name it:
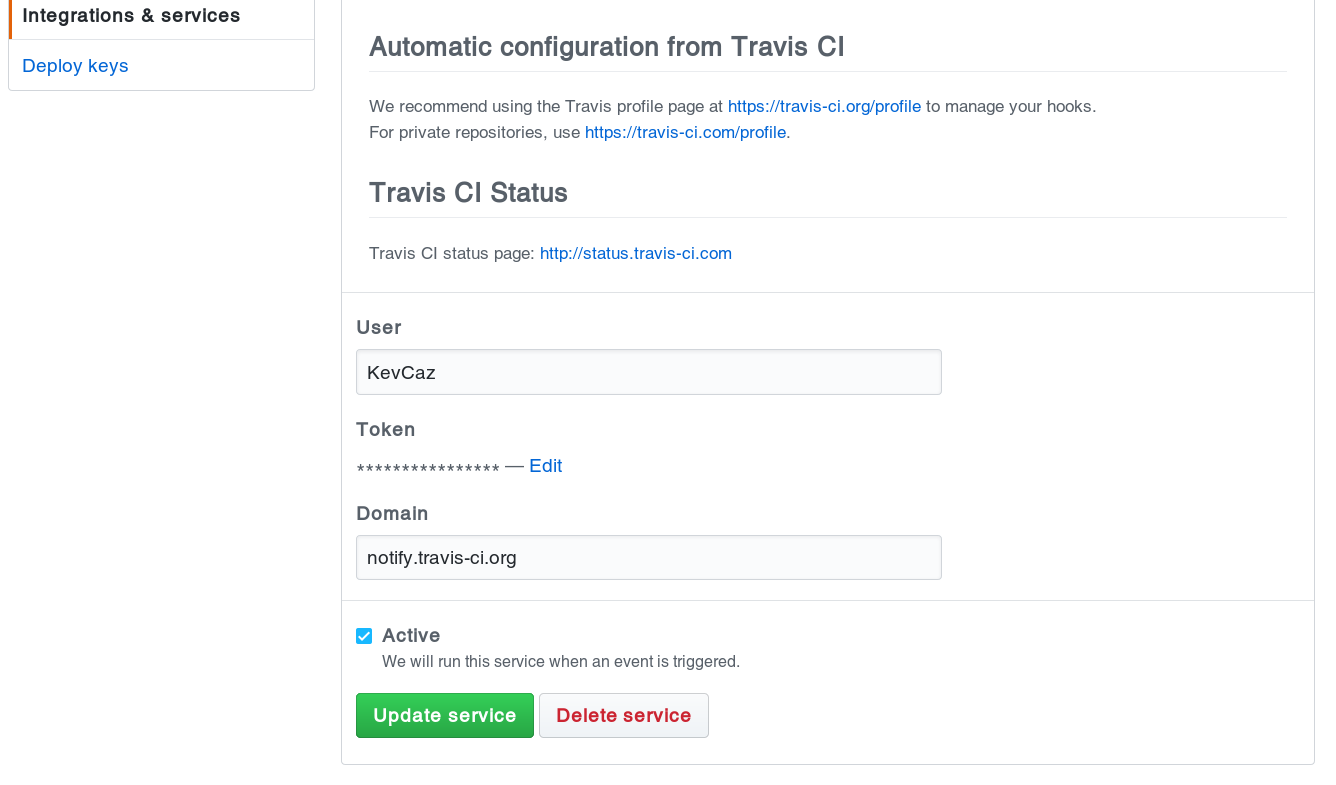
2- Add your token to the repository
- Go to the settings of your website repository and add Travis in
Integration and servicesas shown in the screencast below:
- Add your user name and your token:
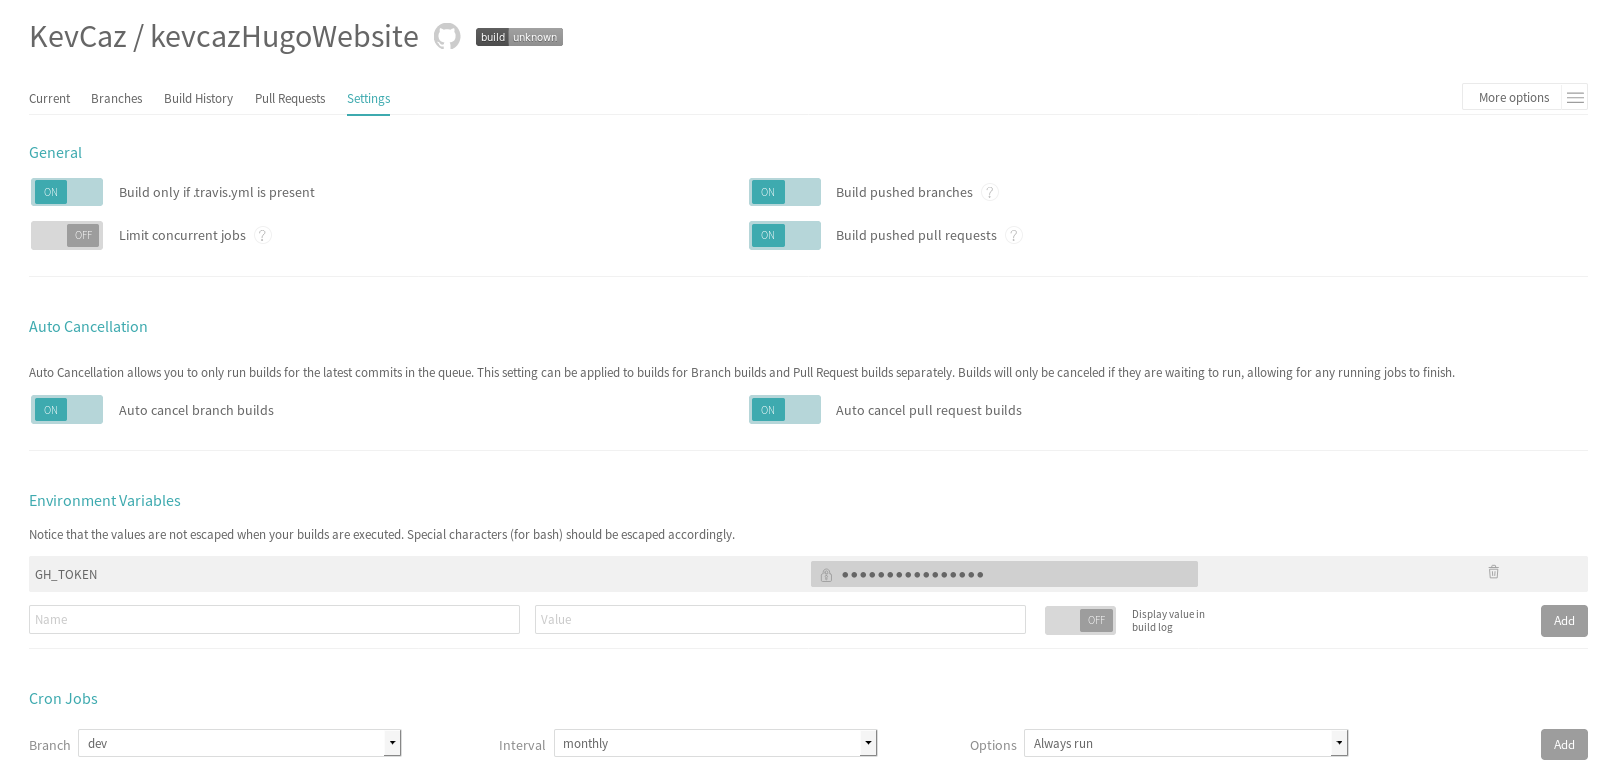
3- Use the token on Travis CI
- Go to the associated Travis repository, then open the settings and add
and environment variable. Pick up a name that actually makes sense to you and
enter the token, we named it
$GH_TOKENas it is short and crystal clear.
4- use the .travis.yaml file
The set of instructions to customize a build on Travis CI
are recorded in a .travis.yaml file that must be included in the Github
repository of the website. In our case, we want to deploy a Hugo website on
the Github-pages which requires a token. All these elements must be
mentioned in our .travis.yaml file. For Kevin personal website, as pure Hugo
is used, we need to install Hugo and build the public website,
here are the parts that contain such instructions (adapted from this):
|
|
For our blog, we used blogdown and here
are what we used in .travis.yaml:
|
|
As we used gh-pages from a public repository in both cases, our options regarding the deployment are similar and include all the details about the deployment including the token passed as a environment variable:
|
|
Note that for both websites, the default branch is dev, where all development
occurs, and we deploy the websites on the master branch (see image below).
Also we bypass Jekyll processing on gh-pages
adding a .nojekyll file in our repository.
About Domain Name System (DSN)
Before reading what follows, note that everything about gh-pages is well
explained on https://pages.github.com/. Basically, a gh-page is a website
associated to a Github repository used, for example, to document a package. To set up a gh-page, go to the setting of
the repository then Options, then scroll down to GitHub Pages and activate
a gh-page. You have two choices: use the master branch or a subfolder docs/.
As explained above we used the master branch. Once set up the URL
associate is basically:
http://+user name+.github.io/+ name of the repository.
For instance for Kevin’s repo mapsWithR a gh-page has been used and its
URL is http://kevcaz.github.io/mapsWithR. Note that you can also have a specific
repository for the website associated to your Github account, see https://guides.github.com/features/pages/.
This is what we use for our blog https://github.com/inSileco/inSileco.github.io (see the
URL do not follow the URL rule described above). Last but not least, if you
already own a domain, you can use it, as explained here.
You will have to deal with your DSN provider though. Kevin used his domain
kevincazelles.fr (see image below) for his personal website now hosted on Github pages.
I (Kevin) would like to thank my friend Johnathan Lubin
for having handled the DSN properly for me 😸, i.e. for having set the
A record properly on always data
my DSN provider.
